Looking for an easy DIY Christmas decoration? This DIY Wood Christmas Tree is easy to make and super festive and customizable.
One of my favorite times of year to decorate is for Christmas.
However, we have cats who are full of mischief and love to knock things over and turn everything into their newest favorite cat toy.
That means no traditional Christmas tree unless I'm constantly wanting to get after the cats and clean up.
That's why we made this super easy DIY wood Christmas tree this year.
All you need is some wood, paint or stain, screws, and whatever you want to decorate your tree with.
This homemade wood Christmas tree is also great if you have limited space.
If you're really limited you could even forgo the space and attach it directly to your wall. You could even put this one outside.
We put ours on a pretty heavy base so the cats couldn't easily knock it over.
With this larger base, you can pile up gifts around the tree or make a theme tree with different decorations.
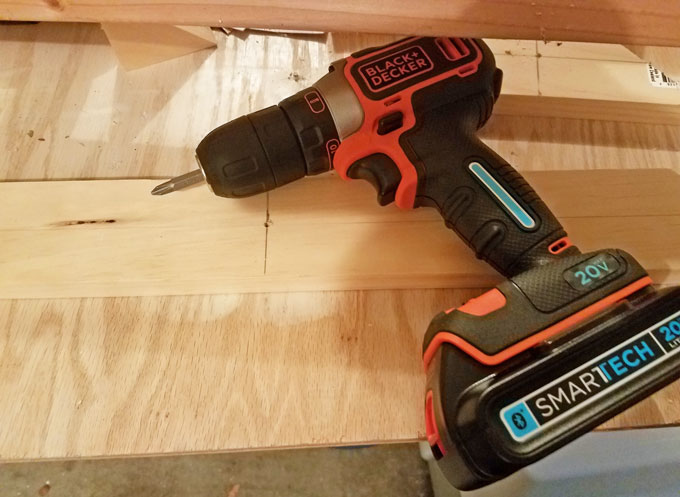
Here's how we put it together using the BLACK+DECKER drill which made things so much easier.
Materials Needed For The DIY Wood Christmas Tree
- BLACK+DECKER SMARTECH™ 20V MAX* Lithium Cordless Drill/Driver or your favorite drill
- Drill bits
- Miter Saw
- Wood for "trunk" of the tree - we used a 4-foot long 2" x 4" piece
- Wood for "branches" of the tree - we had 2 pieces of 6-foot long 1" x 4" (we didn't use all of the second piece)
- Pencil and ruler
- Sander or sanding paper
- Screws for attaching branches and base
- Wood glue (optional)
- Paint or wood stain - we used brown spray paint for the tree trunk and green for the branches
- Plywood for base
- Bracket for attaching the tree to the base
- Wood for base frame (optional)
- Christmas lights or other decorations
- Tree topper (optional)
How to Put Together A DIY Wood Christmas Tree
1. Figure out how tall you want your tree to be. Our tree is about 40 inches tall without the base, and about 44 inches tall with the base.
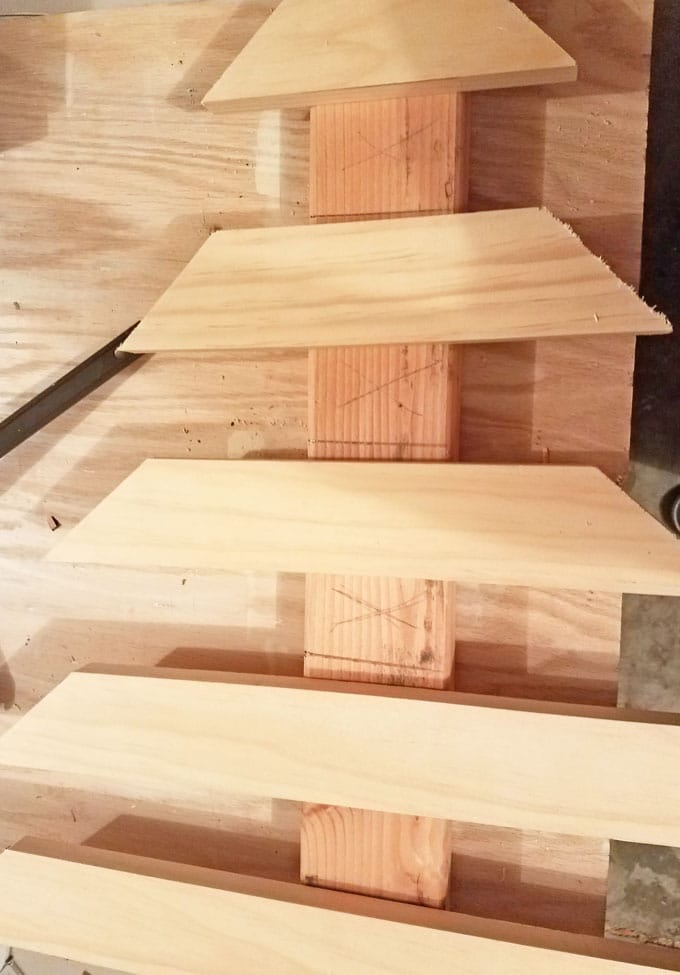
2. Cut the trunk of your tree based on how tall you want it from a 2" x 4". Then cut your branches from the 1" x 4".
We made 6 branches that started at 24 inches long and decreased by 4 inches to the smallest at 4 inches long.
We then cut the edges at a 45-degree angle with the miter saw but you can leave them straight if you prefer.
3. Using a ruler, draw a line down the exact center of the length and height of the branch pieces and the height of the trunk piece with a pencil.
You'll want to drill pilot holes with the drill where the lines intersect on the branch pieces.
This will help the wood not split when you use the screws.
You can then line up the branch pieces on the trunk however you like and draw lines so you know where to place them when you put everything together.
We spaced the branches 4 inches apart.
4. Paint or spray the wood, including the base, as you like and let them dry completely.
You may need to apply multiple coats. If you're using the tree outside you'll probably also want to apply a coat of weatherproof sealer.
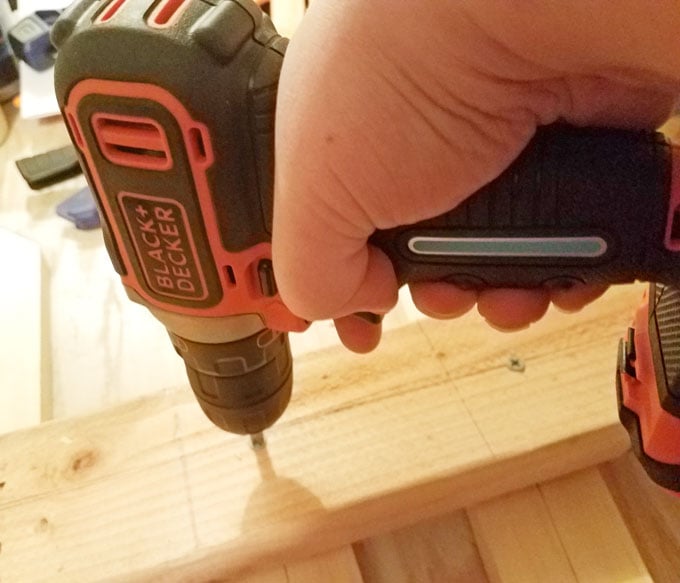
5. Once the paint is dry, use the pilot holes and lines you drew on the trunk to guide where to use screws to attach the branches to the trunk.
We screwed ours through the "back" of the trunk so they wouldn't be visible.
Once you are sure you have them in the right place you can also apply wood glue to the trunk to make sure the branches properly stay in place. We didn't do this so we could take apart the tree for easy storage.

Tip: Use a large box that you've cut open to paint on to keep surfaces from getting messy or having to be cleaned.
6. Attach one side of the bracket with screws using the drill to the tree and then to the base so everything is secure.
We used a ⅝" thick plywood that was 2' x 2' mounted on 2" x 4" cut into 2' lengths to create a square frame for the base.
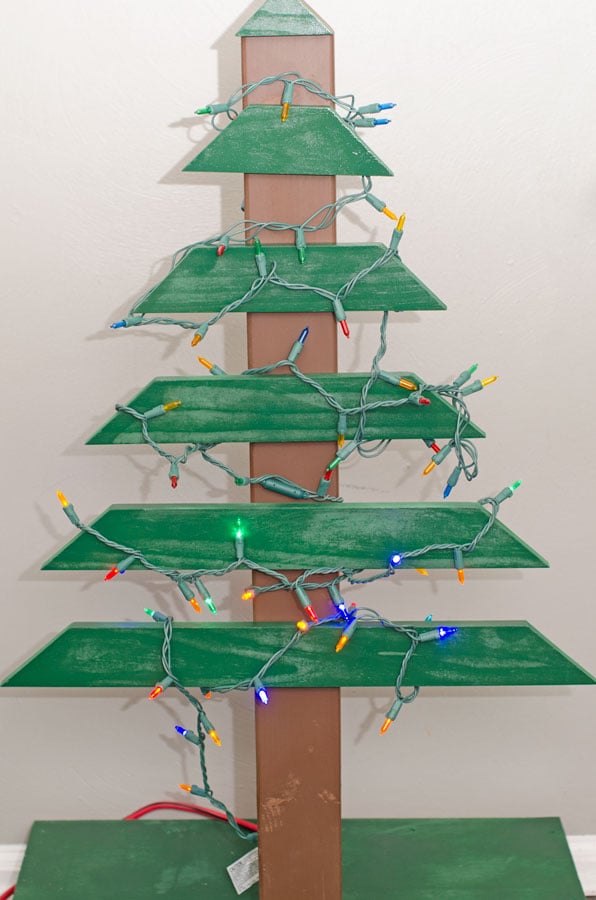
7. Move the tree to where you want it and decorate it as desired.
We decorated ours with a string of LED Christmas lights that I wrapped around the branches.
And there you have your very own handmade wood Christmas tree! I think it would be a neat thing to decorate with the various holidays and celebrations throughout the year.

Brenda Betts
Sunday 14th of October 2018
I love using my Black n Decker tools to make crafts and household repairs. I just made a Christmas tree before finding your site! Can hardly wait to get it painted and lights on it!!
Smart Savvy Living
Tuesday 23rd of October 2018
Hey Brenda,
That's so awesome! I bet it looks gorgeous.